Hacking Your Battery-Operated Roku Remote -- Say Goodbye to Expensive Batteries
Say Goodbye to Dead Remotes with a Clever Hack
We've all been there: you're settling in for a relaxing evening of TV, grab your remote, and... nothing happens. It's the classic frustration of dead batteries. But what if there's a way to cut down on those annoying battery expenses and make your dollars stretch further? In this article, we're going to explore a clever solution that involves hacking your battery-operated remote to add a charging board and rechargeable batteries. Say goodbye to the hassle of constantly replacing batteries and hello to convenience and cost savings!
TV Remotes and Beyond
It's not just TV remotes; it's any battery-operated device that seems to choose the worst possible moment to die on us. However, specialized remotes like those for Roku streaming devices can be even more frustrating when they run out of juice. No batteries on hand? That means no binge-watching your favorite shows. But fear not, there's a better way.
The DIY Solution: Charging Board and Rechargeable Batteries
Imagine a world where you don't need to dash to the store every time your remote goes dark. Enter the DIY solution: adding a charging board and rechargeable batteries to your remote. Not only is this approach cost-effective, but it's also eco-friendly and incredibly convenient.
Getting Started: Tools and Materials
Before we dive into the how-to, let's gather the tools and materials you'll need for this project. Don't worry, you don't need to be a tech whiz to get this done. Basic soldering skills will come in handy, but we'll guide you every step of the way.
Disassembly and Assessment
To get started, carefully disassemble your remote. This might sound intimidating, but it's an essential step. Take a close look at the battery contacts and assess any potential corrosion or damage. This is a crucial stage to ensure your hack will be successful.
Choosing the Right Components
Now that you've assessed your remote, it's time to gather the components for your charging board setup.
Here are some USB charging boards and a rechargeable battery.
The Modding Process
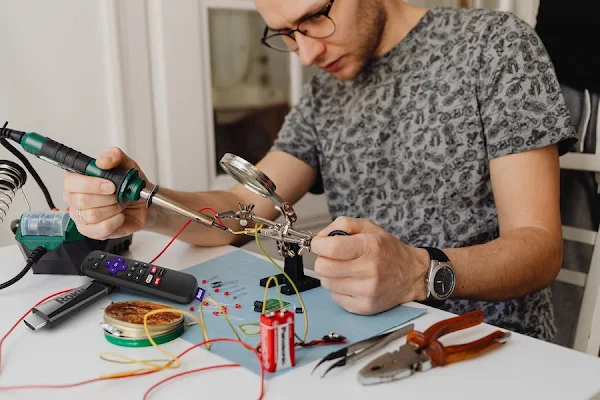
Alright, let's dive in: adding the charging board and Li-ion battery. While this is a fairly easy mod, you'll need a soldering iron and some basic electronic skills. If this is not something you're comfortable with, we highly recommend that you purchase rechargeable batteries that use an external charger. You may lose a little convenience but you won't need to risk destroying your remote control if you mess up.
NiMH Batteries
Once your remote has undergone its transformation, it's time for the moment of truth: testing. We'll guide you through how to test your modded remote to make sure everything is functioning as it should. Get ready to enjoy a longer battery life and the convenience of easy recharging.
Here's a basic guide to help you get started:
**Materials Needed:**
- Remote control
- Li-ion battery (make sure it fits inside the remote)
- Charging board (with appropriate voltage and current specifications)
- Micro USB cable
- Soldering iron and solder
- Wire stripper and cutter
- Heat shrink tubing (optional but recommended for insulating connections)
- Hot glue gun (optional, for securing components)
**Steps:**
1. **Disassemble the Remote:**
Carefully open your remote using the appropriate tools. Remove the existing batteries and set them aside.
2. **Prepare the Charging Board:**
Read the charging board's documentation to understand its wiring and specifications. Prepare the board by soldering necessary wires or connectors (positive and negative) onto the designated pads.
3. **Connect Charging Board:**
Solder the charging board's positive wire to the positive terminal of the Li-ion battery and the negative wire to the negative terminal. Insulate the connections with heat shrink tubing.
4. **Mount the Battery and Charging Board:**
Place the Li-ion battery inside the remote's battery compartment. Position the charging board securely within the remote's casing, making sure it doesn't interfere with buttons or other components.
5. **Wire the Micro USB Cable:**
Cut the Micro USB cable and strip the wires. Solder the positive and negative wires to the appropriate terminals on the charging board. Test the connection to ensure it's secure.
6. **Secure Components:**
If needed, use hot glue to secure the battery, charging board, and Micro USB cable inside the remote's casing. Be cautious not to obstruct any buttons or components.
7. **Assemble the Remote:**
Put the remote's casing back together, making sure all components fit snugly. Test the buttons to ensure they aren't hindered by any added components.
8. **Charge and Test:**
Plug in the Micro USB cable to a power source and observe the battery indicator LED on the charging board. Let the battery charge fully. Once charged, unplug the cable and test the remote's functions.
9. **Monitor Performance:**
Use the remote regularly and keep an eye on battery life and performance. Ensure that the charging process works consistently.
10. **Safety Precautions:**
Remember that working with electronics carries risks. Always follow safety guidelines, work in a well-ventilated area, and avoid exposing the battery to extreme temperatures or conditions.
11. **Troubleshooting:**
If you encounter any issues (e.g., buttons not working, charging problems), double-check your connections, soldering, and component placement. Consult the charging board's documentation for troubleshooting tips.
12. **Enjoy Your Modded Remote:**
Once you're confident that everything is working well, you now have a modded remote with a charging board and Li-ion battery that offers convenience and cost savings.
Remember that the specifics of this process might vary based on the remote model, battery, and charging board you're using. It's essential to carefully review the documentation for each component and adapt the steps accordingly. If you're unsure, consider seeking help from someone experienced with electronics or soldering.
Testing and Results
Once your remote has undergone its transformation, it's time for the moment of truth: testing. We'll guide you through how to test your modded remote to make sure everything is functioning as it should. Get ready to enjoy a longer battery life and the convenience of easy recharging.
Testing Your Modded Remote: A Step-by-Step Guide
Charge Your Remote: Make sure your modded remote is fully charged. Connect the Micro USB cable to the charging port you've added and let it charge for a reasonable amount of time.
Check Battery Indicator: If your charging board includes a battery indicator LED, observe its behavior. A solid or blinking light usually indicates that the battery is charging. Refer to the charging board's documentation for specific details.
Power On Your Remote: Once you believe your remote is charged, power it on. Press the power button or any other relevant button to turn on the device your remote controls (e.g., your TV or streaming device).
Test Basic Functions: Start by testing the basic functions of your remote: volume control, channel selection, and navigating menus. Ensure that the remote responds to your commands and the buttons work as intended.
Check Specialty Buttons: If your remote has specialty buttons (e.g., app shortcuts, voice control), test those as well. Verify that they function without any issues.
Test All Buttons: Go through every button on your remote, ensuring each one works correctly. This includes number buttons, navigation buttons, and any additional buttons specific to your remote's original design.
Test Range: Test the remote's range by using it from different positions in the room. Make sure it works from various angles and distances, just like it did before the modification.
Test Responsiveness: Check the responsiveness of your remote. Ensure that there's no delay between pressing a button and the device's response.
Test Battery Life: Monitor how long your modded remote's battery lasts during regular use. This will give you an idea of how well your charging setup is performing.
Retest After Charging: After depleting the battery, recharge your remote and test it again. Make sure the charging process is smooth and the remote functions well even after charging.
Address Any Issues: If you encounter any issues during testing—buttons not working, unresponsiveness, etc.—review your modification steps. Double-check soldering connections, components, and wiring.
Final Test: Perform a final comprehensive test, cycling through all functions and buttons. If everything works flawlessly, congratulations! Your modded remote is ready for hassle-free use.
Remember, testing is crucial to ensure that your modded remote functions as intended. If you encounter any issues, don't hesitate to revisit your modification and troubleshoot. With a bit of patience and attention to detail, you'll have a reliable and convenient remote ready for action.
Final Thoughts
Congratulations, you've successfully hacked your battery-operated remote! By taking a DIY approach and adding a charging board and rechargeable batteries, you've not only saved money but also contributed to a more sustainable lifestyle. Now you can sit back, relax, and enjoy your favorite shows without worrying about running out of batteries.
This project is just one example of how a little creativity and some basic DIY skills can lead to significant cost savings and a positive impact on the environment. We encourage you to share your experiences and questions in the comments below. Happy hacking!
For more help, you can check out this article with pictures that show how to perform this mod on a Roku remote.
Discover the Top 5 Must-See Recent Posts: Inspiring Stories, Breaking News, and Fresh Content at Your Fingertips!
created by human-assisted by MacGPT
For the latest in TvStreaming and Cord-Cutting News
Join US @ Chitchat
And you will be notified whenever we post a new article
Join US @ Chitchat
And you will be notified whenever we post a new article
Thanks for Making us Your TV Streaming Destination
Roku Channels • Index • Contact • Disclosure • Privacy
© 2025 mkvXstream.com
Use of third-party trademarks on this site is not intended to imply endorsement nor affiliation with respective trademark owners.
We are Not Affiliated with or Endorsed by Roku®, Apple, Google or Other Companies we may write about.

© 2025 mkvXstream.com
Use of third-party trademarks on this site is not intended to imply endorsement nor affiliation with respective trademark owners.
We are Not Affiliated with or Endorsed by Roku®, Apple, Google or Other Companies we may write about.


